Serving Greenville & Surrounding Areas
Blog
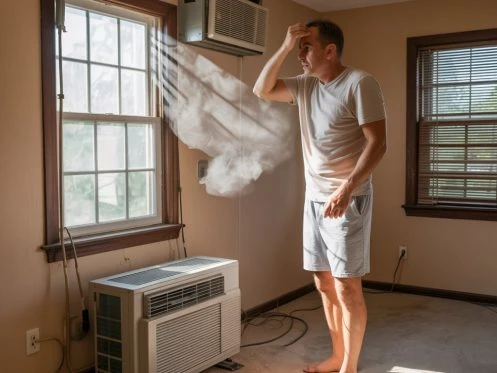
Picture this: You walk outside on a scorching summer day, expecting to hear your AC unit humming away, but instead, you’re met with complete silence. Your indoor unit is running fine, but that outdoor condenser is sitting there like an expensive paperweight. Before you panic about costly repairs, there’s good news – many outdoor AC issues have simple solutions you can try yourself.
At Tuck & Howell Plumbing, Heating & Air, we’ve helped several homeowners diagnose and fix their AC problems since 1969. Most of the time, when your outdoor unit won’t start, it’s one of seven common culprits that don’t require a complete system replacement.
Why Won’t My Outdoor AC Unit Turn On But Inside Is Working?
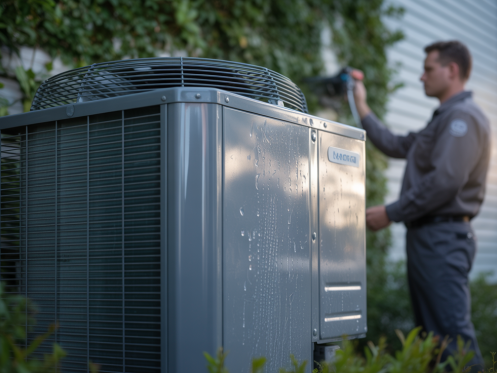
When your indoor unit runs but the outdoor condenser stays silent, you’re dealing with a split system breakdown. This happens because your indoor and outdoor units work as a team – the indoor unit handles air circulation while the outdoor unit releases heat. When they can’t communicate properly, your system goes into protection mode.
The most common reason? Power supply issues. Your outdoor unit operates on 220-240 volts and has its own dedicated circuit breaker. If that breaker trips, your indoor unit keeps working on its separate 110-volt circuit, but your outdoor unit shuts down completely.
Ready to tackle this yourself? Here’s what Tuck & Howell recommends checking first.
7 Common Reasons Your Outdoor AC Unit Won’t Start
Tripped Circuit Breaker or Blown Fuse
Power surges during storms or when your AC works overtime can trip the outdoor unit’s breaker. This protective mechanism prevents electrical damage but leaves you without cooling power.
Quick Fix: Locate your electrical panel and look for a tripped breaker (it’ll be in the middle position between “on” and “off”). Flip it fully to “off,” then back to “on.”
When to Call for Help: If the breaker trips again within a few hours, you likely have a deeper electrical problem that needs professional attention.
Dirty or Clogged Air Filter
A dirty filter forces your system to work harder, which can cause the evaporator coils to freeze. When ice builds up, safety switches kick in and shut down your outdoor unit.
Quick Fix: Replace your filter if it’s gray or brown instead of white. We recommend checking filters monthly and replacing them every three months.
Faulty Capacitor
If your outdoor unit hums but won’t start, you’re probably dealing with a bad capacitor. These small cylindrical components provide the electrical boost needed to start your compressor and fan motor.
Warning Signs: Humming sounds, burning smells, or a bulging/leaking capacitor case.
Safety Note: Capacitors store high voltage even when power is off. This repair always requires a certified technician.
Low Refrigerant Levels
Refrigerant leaks cause pressure drops that trigger safety switches. Your unit won’t start because it’s protecting itself from running dry, which would destroy the compressor.
Signs of Low Refrigerant: Ice buildup on coils, hissing sounds, or reduced cooling despite the indoor unit running.
Legal Requirement: As of 2025, EPA regulations require certified professionals to handle all refrigerant work. DIY refrigerant repairs are illegal and can result in fines.
Thermostat Problems
Dead batteries, incorrect settings, or internal malfunctions prevent your thermostat from sending startup signals to your outdoor unit.
Quick Checks:
- Verify temperature setting is at least 3-5 degrees below current room temperature
- Replace batteries if display is dim
- Check that system is set to “cool” not “heat” or “off”
Need professional ac repair in Greenville, SC? Our certified technicians can diagnose thermostat issues and recalibrate your system for optimal performance.
Clogged Condensate Drain or Tripped Float Switch
Your AC removes humidity from indoor air, creating condensation that drains outside. When this drain clogs, water backs up and triggers a float switch that shuts down your system.
Quick Fix: Check for standing water around your indoor unit. Clear visible clogs with a wet vacuum, but avoid using chemical drain cleaners that can damage your system.
Fan Motor Failure
Extreme heat, debris, or worn bearings can seize your outdoor fan motor. Without proper airflow, your system overheats and shuts down for protection.
Test: With power off, manually spin the fan blade. It should move freely. If it’s stuck or makes grinding noises, the motor needs replacement.
How to Fix Your Outdoor AC Unit Step-by-Step
Safety First: Always turn off power at both the thermostat and the circuit breaker before starting any troubleshooting.
Step 1: Check Your Thermostat Settings
Walk to your thermostat and verify it’s set to “cool” with the temperature at least 3-5 degrees below your current room temperature. If the display looks dim, replace the batteries and wait 5 minutes for the system to reset.
Step 2: Inspect All Power Switches
Look for three switches: the indoor unit switch (usually near your furnace), the emergency switch (often mistaken for a light switch), and the outdoor disconnect switch near your condenser. Make sure all are in the “on” position.
Step 3: Reset Your Circuit Breaker
Head to your electrical panel and locate the breaker labeled for your AC unit. If it’s tripped, flip it completely to “off,” then firmly back to “on.” You should hear a definitive click.
Step 4: Replace Your Air Filter
Remove your filter and hold it up to the light. If you can’t see through it, replace it immediately. A clogged filter is one of the fastest ways to freeze your coils and shut down your outdoor unit.
Step 5: Clear the Condensate Drain
Check around your indoor unit for standing water. If you find puddles, locate the condensate drain line (usually a PVC pipe) and clear any visible clogs with a wet vacuum.
Step 6: Thaw Frozen Coils
If you see ice on your indoor coils, turn off your system completely and let it thaw for 4-6 hours. Check for puddles that might indicate where the water is draining.
Step 7: Listen for Unusual Sounds
Turn your system back on and listen. Normal sounds include gentle humming and fan noise. Concerning sounds include loud humming without fan movement, clicking, or grinding.
When DIY Fixes Aren’t Enough
Some problems require professional expertise, especially when dealing with high-voltage electrical components or refrigerant systems. Here’s when to stop troubleshooting and call the experts:
- Repeated breaker trips signal electrical problems that could cause fires
- Refrigerant leaks require EPA-certified technicians due to 2025 environmental regulations
- Capacitor replacement involves stored electrical charges that can cause serious injury
- Compressor issues typically mean major component failure
At Tuck & Howell, we’ve seen the damage that well-meaning DIY repairs can cause. Our certified technicians have the proper tools and training to diagnose complex problems safely and effectively.
Understanding 2025 Refrigerant Changes
The EPA has implemented new regulations that affect AC repairs in 2025. High-GWP refrigerants like R-410A are being phased out in favor of more environmentally friendly options like R-32 and R-454B.
What This Means for You: If your older system needs refrigerant, certified professionals must handle all refrigerant work. The American Innovation and Manufacturing (AIM) Act requires proper certification, and DIY refrigerant work can result in federal fines.
Expert Insight: As Tuck & Howell Plumbing, Heating & Air with over 50 years in HVAC, explains: “Licensed professionals have the equipment and skills necessary to diagnose and repair complex problems.”
Red Flags That Demand Professional Attention
Watch for these warning signs that indicate serious problems requiring immediate professional intervention:
- Burning smells from your outdoor unit
- Visible damage to wiring or components
- Refrigerant leaks (sweet chemical odor, ice buildup, hissing sounds)
- Capacitor bulging or leaking (cylindrical components with visible damage)
- Compressor hard starts (outdoor unit struggles to start, makes loud noises)
The HVAC industry reports that 90% of AC unit issues stem from bad capacitors and contactor switches, with the remainder typically involving low refrigerant, dirty filters, or dirty coils.
Smart Prevention Strategies
The best repair is the one you never need. Here’s how to keep your outdoor AC unit running smoothly:
Monthly Tasks:
- Check and replace air filters every 1-3 months
- Clear debris from around your outdoor unit (maintain 2-foot clearance)
- Inspect for unusual sounds or odors during operation
Seasonal Maintenance:
- Professional tune-ups before peak cooling season
- Coil cleaning to maintain efficiency
- Refrigerant level checks by certified technicians
Storm Preparation:
- Secure outdoor units against wind and debris
- Check electrical connections after severe weather
- Test operation before the first hot day
Save Money on Your Next AC Emergency
Prevention costs less than emergency repairs. A simple maintenance call can identify small problems before they become expensive failures. We’ve found that homeowners who schedule annual maintenance spend 40% less on emergency repairs over their system’s lifetime.
Smart Timing: Schedule your annual service in early spring when HVAC companies offer better rates and availability. Waiting until summer means higher costs and longer wait times during peak season.
Ready to ensure your AC runs reliably all summer? Contact Tuck & Howell today for expert maintenance that prevents costly breakdowns.
Frequently Asked Questions
Q: Why does my outdoor AC unit hum but not start? A: This typically indicates a faulty capacitor. The humming sound means your compressor is trying to start but lacks the electrical boost needed. Never attempt to repair capacitors yourself – they store dangerous electrical charges even when power is off.
Q: Can I reset my outdoor AC unit myself? A: Yes, you can safely reset your unit by turning off the breaker for 5 minutes, then turning it back on. However, if the unit doesn’t start after this reset, avoid repeated attempts and contact a HVAC professional in Lyman, SC.
Q: How long should I wait after a power outage before turning my AC back on? A: Wait at least 5 minutes after power returns before switching your AC back on. This gives the system’s electrical components time to stabilize and prevents damage from power surges.
Q: What’s the difference between the indoor unit working and an outdoor unit not working? A: Your indoor unit handles air circulation and runs on standard household voltage (110V), while your outdoor unit manages heat exchange and requires higher voltage (220-240V). They can fail independently, which is why one might work while the other doesn’t.
Q: Should I cover my outdoor AC unit when it’s not working? A: Only use manufacturer-approved covers and only during extended non-use periods in winter. Never cover a unit that might receive power, as this can cause overheating and damage.
Q: How do I know if my outdoor AC unit is beyond repair? A: Age is a major factor – units over 15 years old with major component failures (like compressor replacement) often cost more to repair than replace. Multiple simultaneous failures or refrigerant leaks in older systems typically signal replacement time.
Keep Your Cool This Summer
Your outdoor AC unit is the heart of your cooling system, working tirelessly to keep your home comfortable during hot weather. While some fixes are simple enough for homeowners to handle, others require the expertise and safety equipment that only certified professionals possess.
At Tuck & Howell, we’ve been keeping families comfortable since 1969. Our experienced HVAC technicians in Columbus, can quickly diagnose your AC problems and provide honest recommendations that fit your budget. Don’t let a malfunctioning outdoor unit leave you sweating – contact us today to schedule your repair service and get back to enjoying your cool, comfortable home.
Meet the Author